This post contains affiliate links. Please read our disclosure policy for more information.
Have you ever tried baking bread in an air fryer, let alone sourdough? This guide will take you through the surprisingly simple process of creating a small batch of delicious sourdough bread, perfect for smaller households or for those who want to experiment without committing to a large loaf. Sourdough bread is truly an art (and a science), and because of that, the process can get pretty in-depth and complicated. That said, this air fryer sourdough bread recipe is pretty straightforward and perfect for beginners. We’re keeping things simple around here, so let’s dive right in!
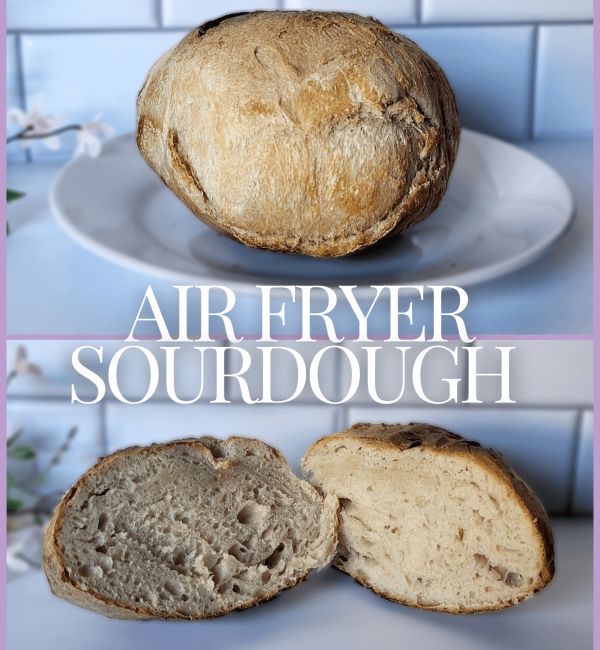
Why Make Sourdough Bread in an Air Fryer?
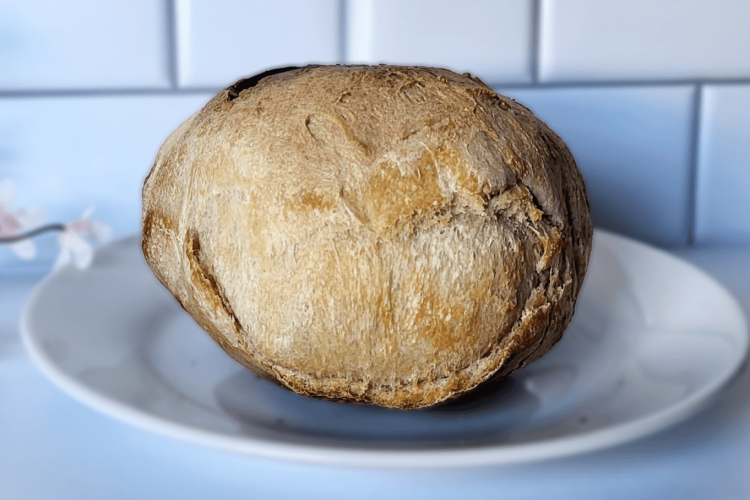
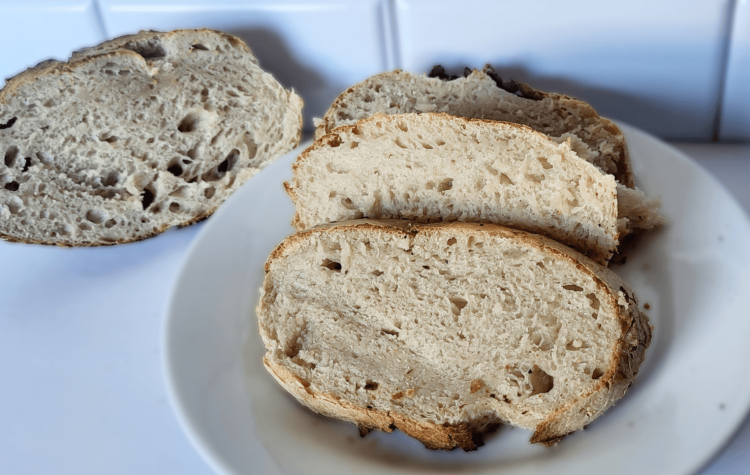
Well, when I first got my air fryer I was obsessed and wanted to cook – and bake – everything I could in it. That, and mainly because we’re in between houses right now, so we’re temporarily living in our RV, which means the oven in here just isn’t the same (it uses flame fueled by propane to heat underneath the food – which doesn’t work well when baking bread). Just putting this out there, don’t expect this air fryer sourdough bread to win any beauty contests, haha! It will have more of a spherical shape to it, rather than that classic, flat bottom you get from baking it in a regular oven. But do know this; it will be delicious with a crusty exterior and a warm, tangy, chewy interior. It’s seriously so yum!
Sourdough Bread Fermentation Process
You’ll want to plan ahead for this recipe due to the unique nature of the fermentation process:
- Natural Yeast Development: Sourdough relies on wild yeast and lactic acid bacteria present in the sourdough starter. These microorganisms take time to grow and become active enough to make the bread rise. See this post on how to make a sourdough starter. If you already have a starter, you’re already steps ahead and can start crafting your air fryer sourdough bread once the starter is active.
- Flavor Development: The long fermentation time helps create the rich, tangy, and unique flavors that make sourdough bread so special. Additionally, the fermentation helps break down gluten, making it more digestible. Yes, thank you!
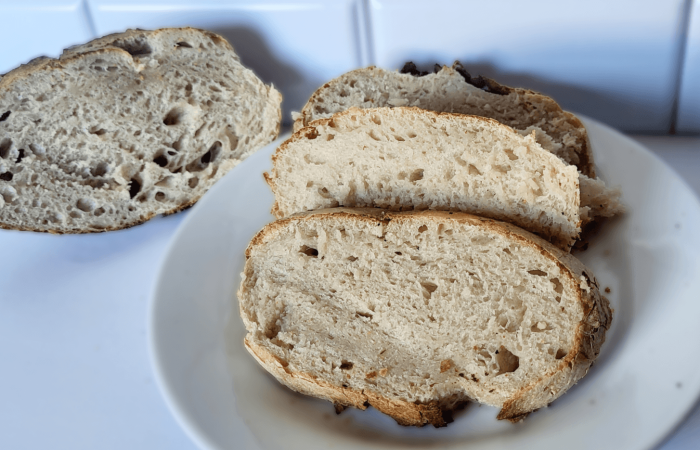
How to Make Small Batch Air Fryer Sourdough Bread
Starter Preparation:
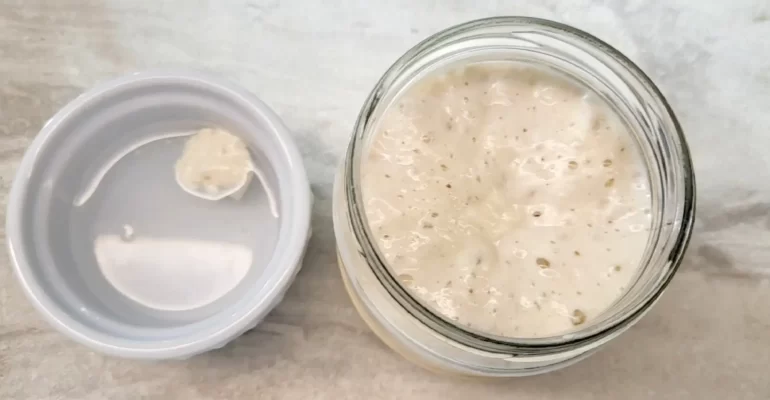
- Feeding the Starter: If you already have a sourdough starter, it needs to be fed several hours before you start baking to ensure it is active and bubbly. This can take anywhere from 4 to 12 hours, depending on the temperature of your home. You’ll know it is active enough to use for baking when it has doubled in size and is bubbly. Optionally, to know for sure, you can take a small spoonful of the starter and drop it into a glass of water. If it floats, it’s ready to use. If it sinks, it needs more time to develop.
- Creating a Starter from Scratch: If you need to make a sourdough starter from scratch, it can take about 5 to 10 days of daily feeding for the starter to become strong enough to use in baking. See this post on how to make a sourdough starter. Trust me, the wait is worth it.
Just a heads up: this post contains affiliate links, which means I may earn a small commission (at no extra cost to you) if you make a purchase through them. These are all items I’ve personally used and love. Thank you for supporting my blog! 😊
Equipment and Ingredients:
- Air Fryer
- Kitchen scale
- Mixing bowl
- Small bowl
- Cotton cloth or tea towel
- Parchment paper
- Plastic wrap
- Tongs (optional)
Ingredients
- 235 grams bread flour
- 45 grams active sourdough starter
- 150 grams filtered water
- 5 grams salt
- Rice flour or all purpose flour for dusting
- Olive oil or non-stick cooking spray for greasing
Step-by-Step Instructions:
Mix the Dough
- In a mixing bowl, combine the active sourdough starter, filtered water, and salt. Give it a little mix, but don’t worry about it not being fully incorporated yet.
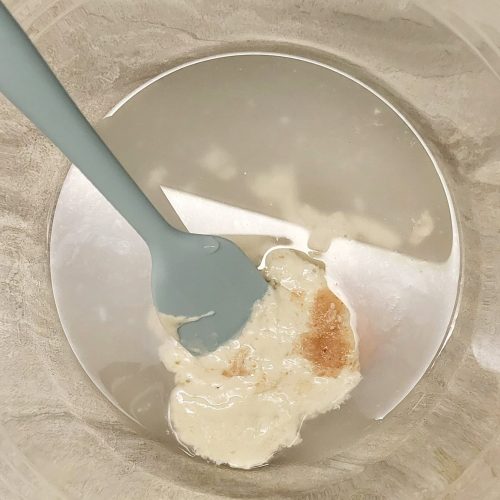
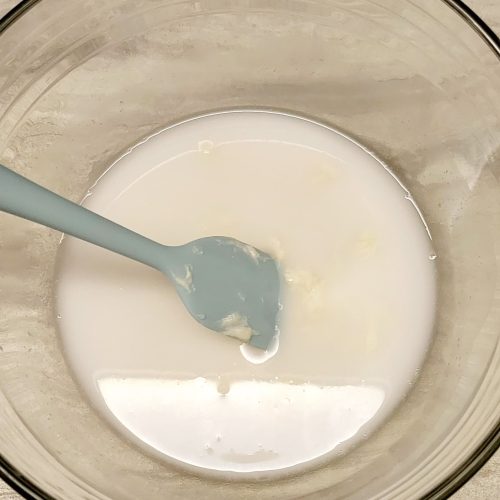
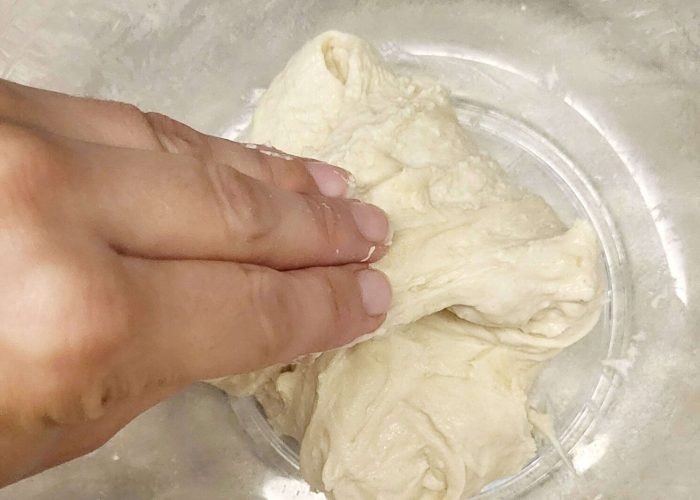
- Add the bread flour to the bowl, and stir continuously to form a tacky dough. Lightly knead the dough with your hands until it comes together. Note, certain brands of flour absorb water differently, so if you feel the dough is too dry, add about a teaspoon of water at a time. If it sticks too much to your hands, add a teaspoon of flour at a time.
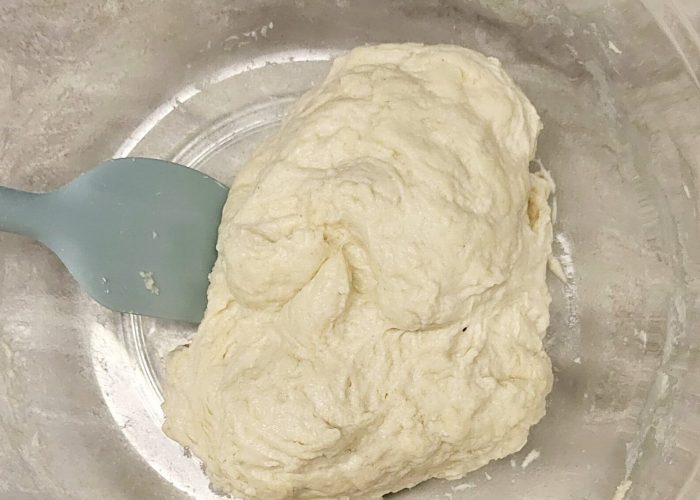
- Cover the bowl with plastic wrap and let the dough rest for 20 minutes. This allows the flour to absorb the water.
- After 20 minutes, grab one edge of the dough and pull it upwards to let it stretch out. Bring the stretched part of the dough to the center. Grab the opposite side of the bread and do the same thing: stretch it upwards and bring it to the middle. Do this again with the other two sides of the dough (to complete 4 stretches).
- 20 minutes later, repeat: 4 stretches.
- 20 minutes later, repeat one last time: 4 stretches.
Bulk Fermentation
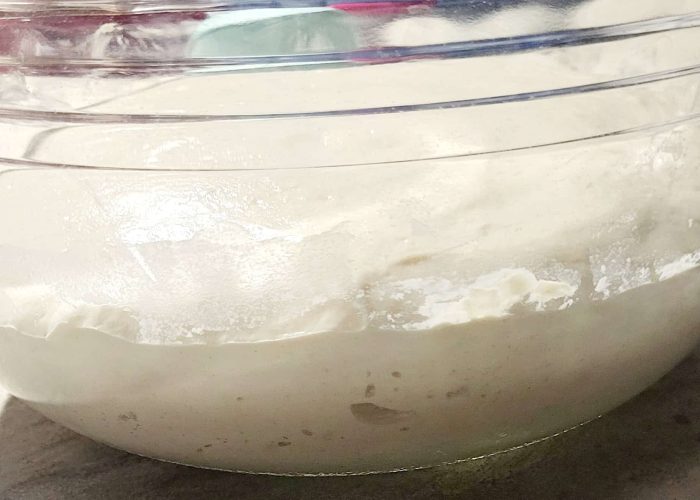
- Leave the dough in the mixing bowl and cover it with plastic wrap. Let it rest at room temperature for 6-12 hours to bulk ferment. During this time, it will grow in size. The final timing will depend on the temperature in your home; It’ll rise faster in warmer temperatures, and take longer to rise in colder temperatures.
How to Tell When Bulk Fermentation is Complete
Many sourdough bread guides will tell you to wait until the dough has doubled in size before proceeding to the next step, however this isn’t always accurate and can also be confusing to new bakers. The dough doesn’t have to double in size, and if the temperature in your home is on the warmer side (78°F / 25°C or above), there’s a chance that the dough will over proof if you wait until it doubles in size (and we don’t want that). Here’s what to look for instead to know when bulk fermentation is complete:
- It definitely grew in size
- The top surface of the dough has a domed shape
- Bubbles under the top surface of the dough (like in my photo above)
- The dough slightly jiggles or wobbles when you gently shake the bowl
Shape the Dough
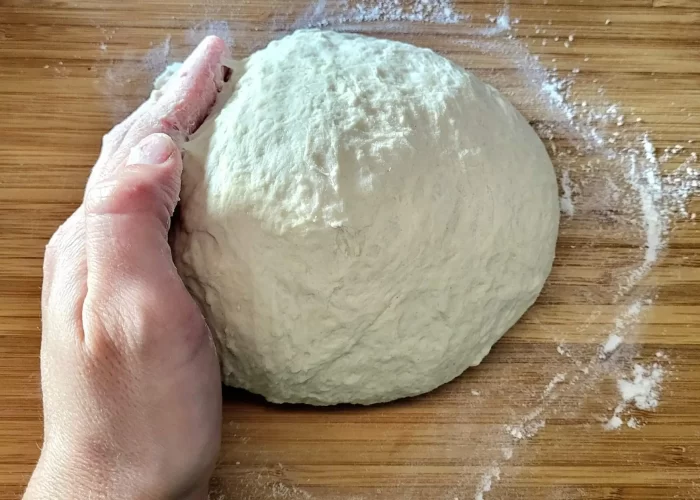
- Once the first bulk fermentation is complete, remove the dough from the bowl and place it on a clean and lightly floured counter surface. Do one stretch and fold, and then form it into a ball by turning (or spinning) it a few times on the counter. This creates tension and gives it a good shape once baked.
Optional Second Cold Fermentation and Cool Facts
Most sourdough bread guides will encourage a second (cold) bulk fermentation before baking, but this isn’t always necessary and I’ll explain why here. Bread baking has been practiced for over ten thousand years, and refrigeration didn’t become a thing until the early 1900s. Sourdough doesn’t need to cold ferment, but there are benefits of doing so. After weighing the pros and cons, you can decide for yourself whether to do the second cold fermentation or not (which I usually always do).
Pros of cold fermentation:
- Cold fermentation brings out a different sour flavor to your bread. This is because when sourdough ferments in warm temperatures, it produces lactic acid which gives the bread more of a sour flavor. When it ferments in cold temperatures, it produces acetic acid, giving it a more tangy flavor. That said, your sourdough will have a more complex and delicious flavor to it.
- Longer fermentation means your dough is creating more beneficial bacteria and breaking down phytates in the grains which helps your body absorb more of its nutrients and is easier to digest.
- The dough is easier to handle and score when it’s cold.
- Cold fermentation can work best with your schedule if you don’t have time or don’t want to bake your bread at night. Usually, the first bulk fermentation will be completed in the evening or night hours (if you start the process in the morning). By placing the dough in the fridge overnight, you can choose the baking time the next morning based on what works with your schedule.
Cons of cold fermentation:
- Longer waiting period before you can actually bake your bread.
- Can over ferment if you leave it too long in the fridge (over 24 hours).
- Not traditional practice, as refrigeration didn’t become a thing until the early 1900s.
Second Cold Fermentation Steps
If you decide to do the second cold fermentation, simply follow these steps:
- Line a small/medium sized bowl with a thin cotton cloth or tea towel, and dust it very well with rice flour (or all purpose flour if you don’t have rice flour).
- Place dough on top of the tea towel and cover with plastic wrap.
- Transfer the bowl to the refrigerator overnight, or for 12-18 hours.
If Not Doing a Second Cold Fermentation
If you decide not to do the second cold bulk fermentation, simply follow these steps:
- Line a small/medium sized bowl with a thin cotton cloth or tea towel, and dust it very well with rice flour (or all purpose flour if you don’t have rice flour).
- Place the shaped dough on top of the tea towel and cover it with plastic wrap.
- Leave it out on your counter for another 2-4 hours, or until you see it rise again. Remember, the rise time depends on the temperature in your home.
Prepare for Baking
- Preheat the air fryer to 400°F (205°C).
- Cut enough parchment paper to line the bottom of your air fryer pan (make sure to leave the parchment paper out of the air fryer while it preheats). Grease parchment with cooking spray or oil.
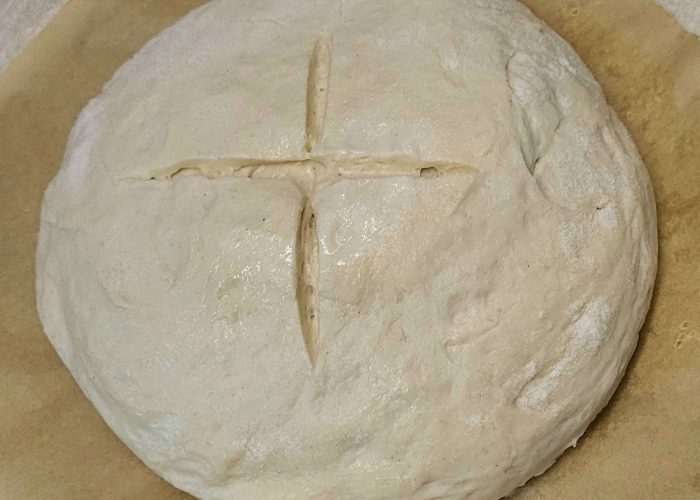
- Score the top of the dough with a razor or sharp knife to allow for controlled expansion.
- Place the dough on top of the parchment.
- Once the air fryer is preheated, carefully transfer the parchment paper with dough into it.
Bake the Sourdough
- Bake the dough on the air fry setting at 370°F (190°C) for 15 minutes.
- Flip the dough over (using tongs will help) and bake it again at 370°F (190°C) for another 15 minutes, or until the bread is golden brown and sounds hollow when tapped on.
- Remove the sourdough from the air fryer and let it rest on a cooling rack for at least 1 hour before cutting into it and enjoying. Like, really enjoying, because you will.
Notes and Tips for Air Fryer Sourdough Bread
- Use a well-fed and active sourdough starter for the best rise and flavor. If your starter is not active, and/or your dough doesn’t complete its first fermentation, the bread will not fully bake in the middle regardless of the amount of time you bake it or the temperature you use (this is called under proofed).
- Likewise, if you leave the dough out for too long after it has increased in size during the first fermentation, you risk over proofing, and your bread will likely come out dense.
- During the first fermentation, keep the dough in a warm, draft-free place.
- After baking, allow the bread to cool for at least 1 hour before slicing to preserve its texture and prevent it from becoming gummy.
FAQs and Troubleshooting
This post contains affiliate links. Please read our disclosure policy.
The gluten in bread flour is strong and gives your bread a good rise. It is also easier to work with and is more forgiving, making it perfect for beginners.
Yes, you can still use your starter for this recipe.
No, once the cold bulk fermentation is complete, remove the dough from the refrigerator, score it, and bake it while it's still cold. The baking time remains the same.
Most likely because your starter wasn't active enough. If your starter was not active, and/or your dough didn't complete its first fermentation, the bread will not fully bake in the middle regardless of the amount of time you bake it or the temperature you use (this is called under proofed). Make sure your starter is well fed and active before using it for baking. Likewise, ensure the dough has completed the first fermentation before shaping. See post for more details about how to know when fermentation is complete.
This is likely due to either not doing the stretch and folds, or leaving the dough out for too long after it has increased in size during the first fermentation. In this case, the dough has over fermented, also called over proofed. Once you see the dough has completed its first fermentation, make sure to shape it into a ball and proceed to the next steps to avoid over-proofing. See post for more details about how to know when fermentation is complete.
For the best results and texture, you should wait at least 1 hour, otherwise the bread might turn out gummy. Also, the bread continues cooking after it comes out of the oven, so it may be slightly undercooked if you don't wait. However, I've been there! I know how hard it is to wait, and I've sliced into mine right out of the oven plenty of times. It's up to you.
Rice flour is less likely to absorb moisture compared to all purpose or bread flour. It does a better job at preventing the dough from sticking to the cloth or tea towel. However, if you don't already have rice flour, all purpose or bread flour will still work. Just dust liberally.
This recipe works perfectly in my 4 quart air fryer. Most air fryers can accommodate small to medium-sized loaves.
Other Fermented Recipes you Might Like

Air Fryer Sourdough Bread Recipe
Equipment
- Air Fryer
- Kitchen scale
- Mixing bowl
- Small bowl
- Cotton cloth or tea towel
- Parchment paper
- Plastic wrap
- Tongs for flipping the bread (optional)
Ingredients
- 235 grams bread flour
- 45 grams active sourdough starter
- 150 grams filtered water
- 5 grams salt
- Olive oil or non-stick cooking spray (for greasing)
- Rice flour or all purpose flour (for dusting)
Instructions
Feeding the Starter
- If you already have a sourdough starter, feed it several hours before you start baking to ensure it is active and bubbly. This can take anywhere from 4 to 12 hours, depending on the temperature of your home.
Creating a Starter from Scratch
- If you need to make a sourdough starter from scratch, it can take about 5 to 10 days of daily feeding for the starter to become strong enough to use in baking. See post about creating a starter from scratch.
Mix the Dough
- In a mixing bowl, combine the active sourdough starter, filtered water, and salt. Give it a little mix, but don’t worry about it not being fully incorporated yet.
- Add the bread flour to the bowl, and stir continuously to form a tacky dough. Lightly knead the dough with your hands until it comes together. Note, certain brands of flour absorb water differently, so if you feel the dough is too dry, add about a teaspoon of water at a time. If it sticks too much to your hands, add a teaspoon of flour at a time.
- Cover the bowl with plastic wrap and let the dough rest for 20 minutes. This allows the flour to absorb the water.
Stretch and Folds
- Grab one edge of the dough and pull it upwards to let it stretch out. Bring the stretched part of the dough to the center. Grab the opposite side of the bread and do the same: stretch upwards and bring it to the middle. Do this again with the other two sides of the dough (to complete 4 stretches).
- 20 minutes later, repeat: 4 stretches.
- 20 minutes later, repeat one last time: 4 stretches.
Bulk Fermentation
- Leave the dough in the mixing bowl and cover it with plastic wrap. Let it rest at room temperature for 6-12 hours to bulk ferment. During this time, it will grow in size. The final timing will depend on the temperature in your home; It’ll rise faster in warmer temperatures, and take longer to rise in colder temperatures. You'll know bulk fermentation is complete when you see that: it definitely grew in size, the top surface of the dough has a domed shape, bubbles appear under the top surface of the dough, and the dough jiggles or wobbles when you gently shake the bowl.
Shape the Dough
- Once the first bulk fermentation is complete, remove the dough from the bowl and place it on a clean and lightly floured counter surface. Do one stretch and fold, and then form it into a ball by turning (or spinning) it a few times on the counter. This creates tension and gives it a round shape once baked.
Optional Second Cold Fermentation (see post for more details and cool facts about this recommended step)
- Line a small/medium sized bowl with a thin cotton cloth or tea towel, and dust it very well with rice flour (or all purpose flour if you don’t have rice flour).
- Place dough on top of the tea towel and cover with plastic wrap.
- Transfer the bowl to the refrigerator overnight, or for 12-18 hours.
If NOT Doing a Second Cold Fermentation
- Line a small/medium sized bowl with a thin cotton cloth or tea towel, and dust it very well with rice flour (or all purpose flour if you don’t have rice flour).
- Place the shaped dough on top of the tea towel and cover it with plastic wrap.
- Leave it out on your counter for another 2-4 hours, or until you see it rise again. Remember, the rise time depends on the temperature in your home.
Prepare for Baking
- Preheat the air fryer to 400°F (205°C).
- Cut enough parchment paper to line your air fryer pan (make sure to leave the parchment paper out of the air fryer while it preheats). Grease parchment with cooking spray or oil.
- Score the top of the dough with a razor or sharp knife to allow for controlled expansion.
- Place the dough on top of the parchment.
- Once the air fryer is preheated, carefully transfer the parchment paper and dough into it.
Bake the Sourdough
- Bake the dough on the air fry setting at 370°F (190°C) for 15 minutes.
- Flip the dough over (using tongs will help) and bake it again at 370°F (190°C) for another 15 minutes, or until the bread is golden brown and sounds hollow when tapped on.
- Remove the sourdough from the air fryer and let it rest on a cooling rack for at least 1 hour before cutting into it
- Note, not all air fryers bake the same, so stay open to adjusting the baking times and/or temperatures. You'll know what works best with your particular air fryer once you've tried this recipe the first time.
Notes
- Use a well-fed and active sourdough starter for the best rise and flavor. If your starter is not active, and/or your dough doesn’t complete its first fermentation, the bread will not fully bake in the middle regardless of the amount of time you bake it or the temperature you use (this is called under proofed).
- Likewise, if you leave the dough out for too long after it has increased in size during the first fermentation, you risk over proofing, and your bread will likely come out dense.
- During the first fermentation, keep the dough in a warm, draft-free place.
- After baking, allow the bread to cool for at least 1 hour before slicing to preserve its texture and prevent it from becoming gummy.
- This recipe works perfectly in my 4 quart air fryer, however most air fryers can accommodate small to medium-sized loaves.
- See post for FAQs, troubleshooting, and more details.
Macros for 1/5 loaf
Calories: 173
Fat: 1
Carbs: 36
Protein: 6


