Brewing your own kombucha at home is easier than you might think. With just a few simple ingredients and a little patience, you can craft your own delicious, fizzy kombucha right in the comfort of your own home. In this guide, I’ll show you how to make kombucha step-by-step, so you can start enjoying this probiotic-rich drink asap!
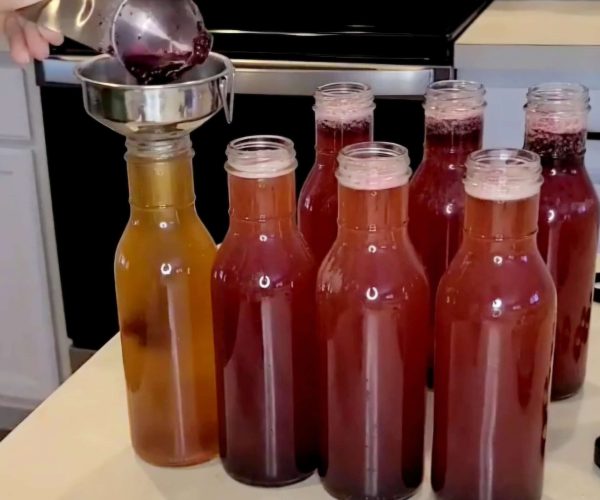
I started brewing kombucha at home a few years ago, just out of curiosity, and it quickly became a favorite at our house. My kids and I absolutely love it (I can’t say the same for my husband, haha) — and we try to always have a fresh batch brewing, along with water kefir. It’s been so much fun experimenting with different flavors, too. What started as a bit of curiosity has turned into a healthy, homemade drink that we get to enjoy often.
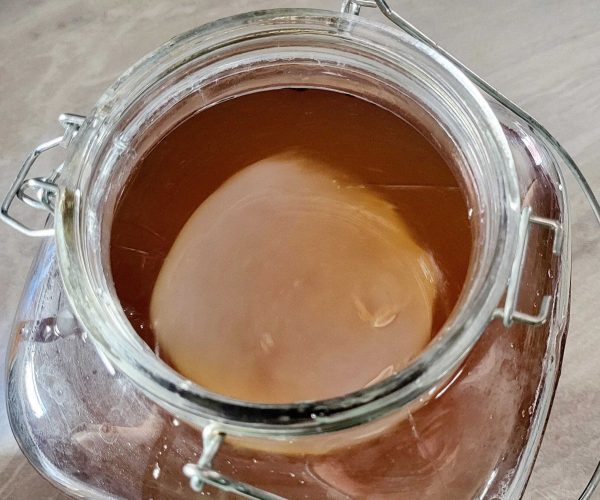
What is Kombucha and Why Make it at Home?
Kombucha is a fizzy, tangy drink made from fermenting sweet tea with a SCOBY (Symbiotic Culture of Bacteria and Yeast). Once it’s done fermenting, it becomes full of probiotics, antioxidants, and enzymes that are great for our gut and overall wellness. Kombucha has been around for centuries and is valued for its many health benefits.
Why make it yourself? First, it’s less expensive to brew at home than to buy it from the store, especially if you drink it often. Second, you can customize it to control the flavor, strength, and sweetness of your liking. Plus, brewing kombucha at home is fun, simple, and helps you skip any unwanted additives that are often found in store-bought versions.
What Does Kombucha Taste Like?
After the first fermentation, kombucha has a slightly sweet and tangy flavor. The longer it ferments, the less sweet it becomes, because the SCOBY continues to eat more of the sugar from the first brew. It will also have some vinegar undertones, which is normal and expected. At this stage, it’s typically flat, but a lot of people enjoy drinking it this way.
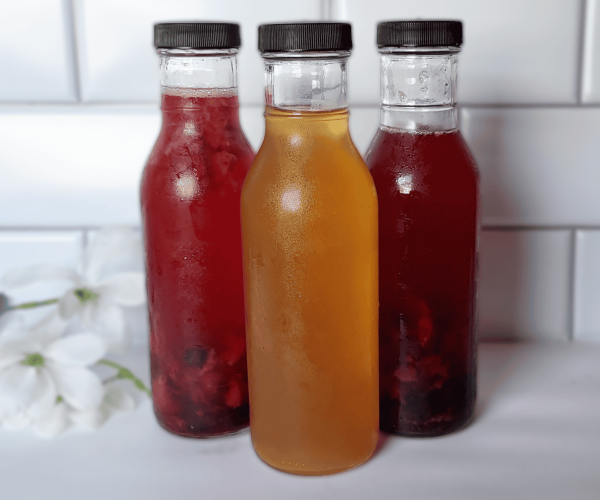
Putting kombucha through a second fermentation is optional, but I highly recommend it. It involves transferring it into carbonation-safe bottles, flavoring it with fruit, juice, or sugar, and keeping the lid sealed until carbonation forms. Once done, it becomes bubbly, fizzy, and slightly sweet. This fermentation allows the flavors to deepen and become more complex. The tanginess will still be there, but it’ll be balanced by the flavors you added.
Is Drinking Kombucha Good for You?
There are several benefits of adding kombucha to your diet. Many of them come from the probiotics that are in it:
Kombucha contains several probiotics (good bacteria) that can help balance your gut. Many fermented foods contain similar probiotics, like fermented vegetables, dairy products, and sourdough.
The probiotics and antioxidants in kombucha can also help boost the immune system.
Research studies also show that there’s a connection between gut health and how we feel mentally, which means a healthy gut may help to improve mood and brain function.
How to Make Kombucha: First Fermentation
The first fermentation usually takes around 7-14 days to complete. The process involves brewing a sweet tea and adding a culture (SCOBY) and a starter tea to it. When it’s complete, it will have a tangy flavor, but with no carbonation.
You can purchase a SCOBY with starter tea online (check the company’s reviews first). I initially bought mine through a local company here in Florida, although they ship to all states. But there are a few good companies out there selling good quality SCOBYs. I’d first check on Amazon.
Equipment:
- 1 Gallon glass or lead-free porcelain jar (I use one with a dispenser but that’s optional)
- Breathable cover (muslin cloth, cheesecloth, thin tea towel, coffee filter, etc)
- Rubber band
- Small to medium pot
- Strainer, tea ball, or muslin tea bag (if using loose-leaf tea)
- Long spoon (wooden, silicone, or plastic)
- Separate glass container (to store the SCOBY plus 2 cups of kombucha starter tea for future use)
Ingredients:
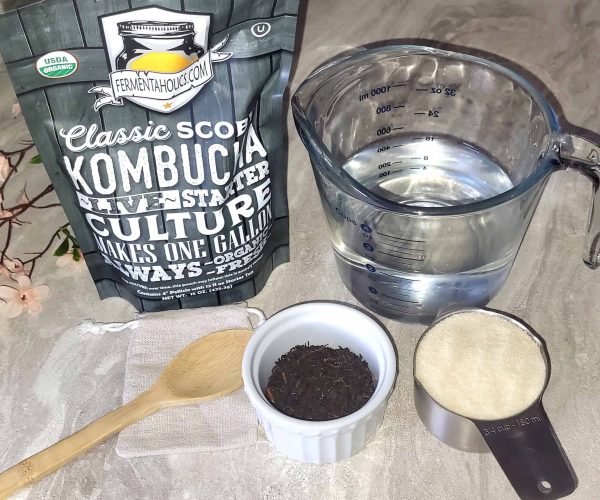
- 2 cups spring or filtered water (to make a concentrated tea)
- 10 cups room temperature water (spring or filtered water)
- 2 – 3 tablespoons loose-leaf black or green tea, or 6 – 8 tea bags (I use black tea; use 2 tablespoons or 6 tea bags for a slightly milder tea, and 3 tablespoons or 8 tea bags for a stronger tea)
- 3/4 cup organic cane sugar
- 1 live kombucha SCOBY (not dehydrated)
- 1.5 – 2 cups kombucha starter tea (if you purchase a live SCOBY it usually comes in a starter tea, alternatively you can use store-bought raw unpasteurized unflavored kombucha)
Instructions:
- Brew a concentrated batch of sweet tea by bringing two cups of water to a boil. Turn the heat off, add the tea, and let it steep for 10-15 minutes. Remove the tea ball or muslin tea bag, or strain to remove the leaves. Add the sugar and stir until dissolved.
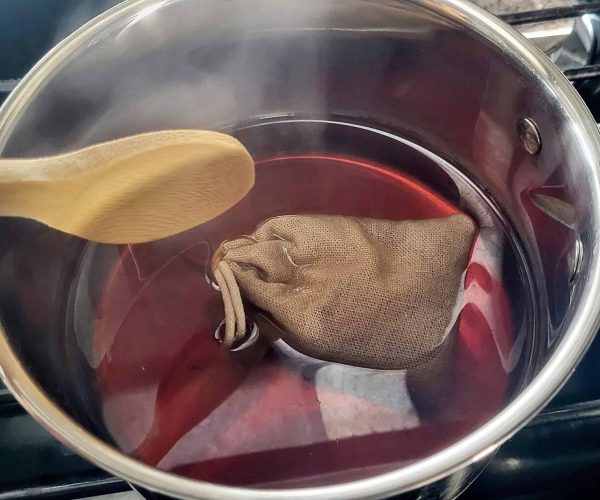
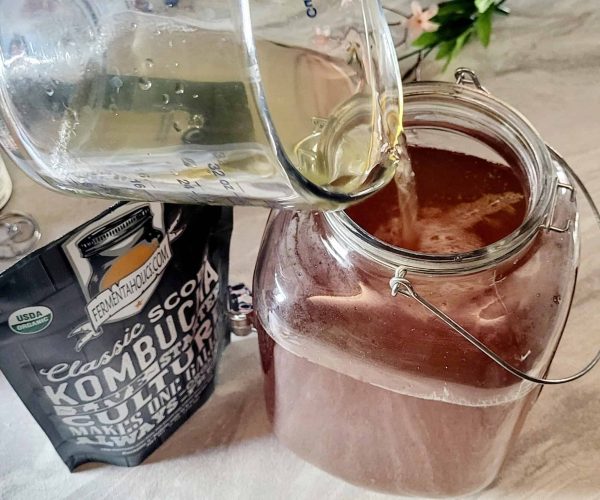
- Pour the hot sweet tea into the 1 gallon jar, and then add 10 cups of room temperature water to it. This helps cool down the hot tea; you can’t add the SCOBY or starter tea to hot liquids, as the live cultures can die. The temperature of the tea should be below 85°F (29°C), but not too cold.
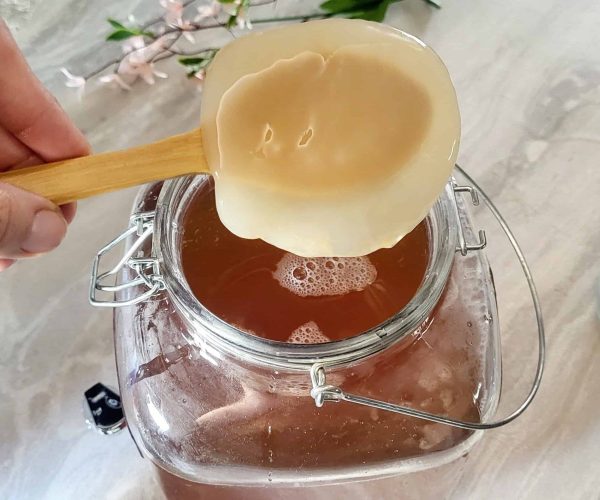
- Add the kombucha SCOBY and 1.5 – 2 cups of starter tea to the jar, then give it a gentle stir.
- Cover the opening of the jar with the breathable cloth and secure it with a rubber band.
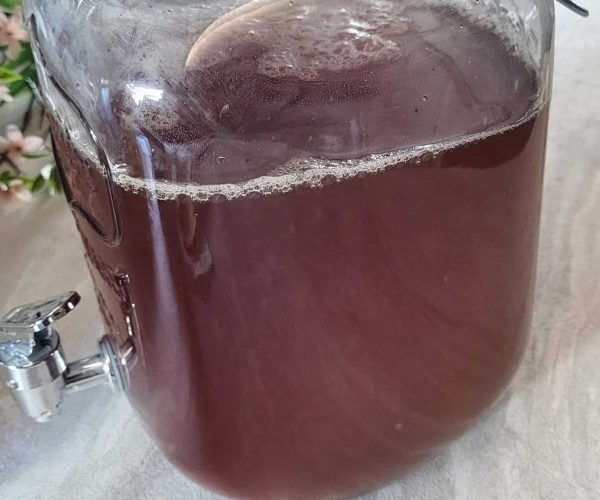
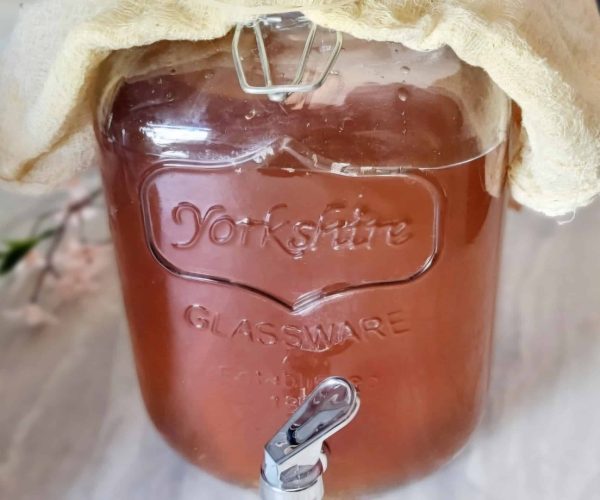
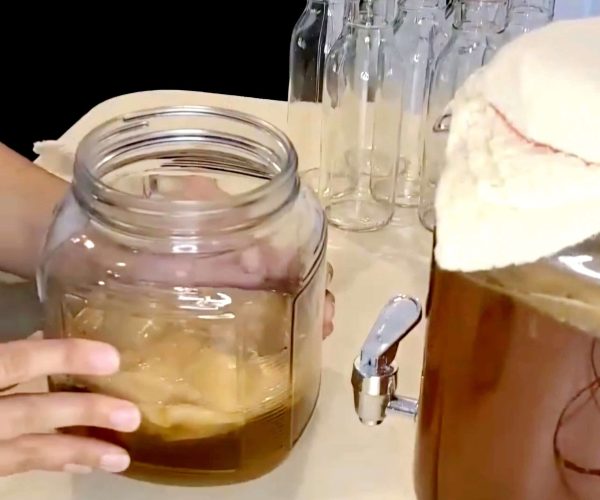
- Place jar on top of a counter, or in the pantry, away from direct sunlight. Leave it undisturbed for 7-14 days. Feel free to taste it around the 7 day mark to see if it still tastes sweet. If so, leave it out for another few days to 1 week. When it’s done, it should be just slightly sweet with tangy, vinegary notes. The fermentation time depends on the temperature in the home; the colder it is, the slower it ferments, the warmer it is, the faster it ferments.
- At this point the first fermentation is done. If you don’t want to put it through a second fermentation for flavoring and carbonation, you can transfer the kombucha to bottles and refrigerate them.
- NOTE: Whether you choose to stop after the first fermentation or put it through a second fermentation, you’ll want to first remove the SCOBY and 2 cups of the kombucha tea, and place them in a separate glass jar (aka SCOBY hotel). This is what you will use to make a future batch of kombucha. Secure a breathable cover over it, and store it in a cool and dark location like a pantry or cabinet until you are ready to use it again.
How to Make Kombucha: Second Fermentation
The second fermentation usually takes around 2-4 days. The process involves bottling the kombucha with fruit, juice, and/or sugar. The bottles are then sealed with airtight lids and left to ferment in order to create a flavorful carbonated drink. The most important thing here is to make sure you are using carbonation-safe bottles, which are designed to hold pressure build-up.
Equipment:
- 16 oz bottles (6-7), or 12 oz bottles (7-8)
- Pitcher or glass measuring cup with spout (optional), or simply use a funnel
Ingredients:
- Fresh fruit (pureed, mashed, diced, or whole) or fruit juice (the live cultures need a sugary source of food, and this will also help create carbonation)
- Herbs of choice (optional)
- Organic cane sugar (only if you don’t want to use fruit/fruit juice, or if you’re using fruit with low sugar content like just about any berry, wild blueberries, cranberries, rhubarb, lemon, or lime)
Instructions:
- Stir the remaining kombucha (to reincorporate all of the yeast and live cultures throughout).
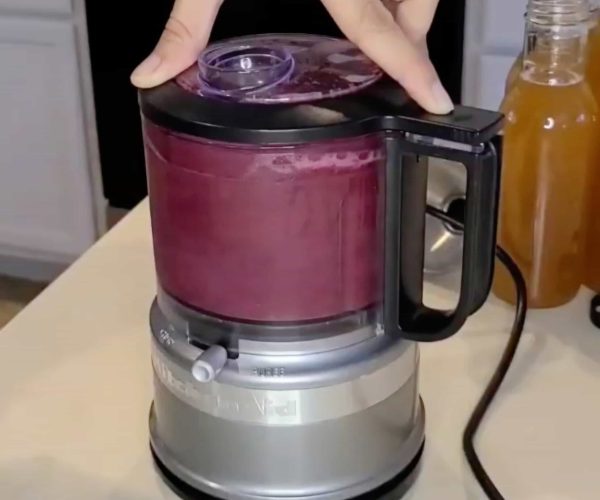
- If using 12 oz bottles, add 1/4 cup of fruit juice, or pureed or fresh fruit, into each of your bottles (using a funnel will help). If using 16 oz bottles, add 1/3 cup. If you are not using fruit or juice, or are using fruit with low sugar content, add 1 teaspoon of sugar to each 12 oz bottle, or 1.5 teaspoons to each 16 oz bottle.
- Top each bottle off with kombucha, leaving about 1/2 – 1 inch of headspace at the top of the bottles.

- Place all of the lids on tightly, and then invert them gently a few times to incorporate the fruit/sugar into the tea.
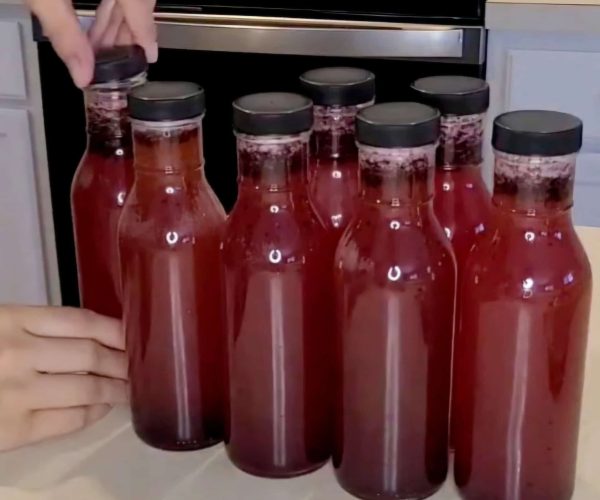
- Leave the bottles out on your counter or pantry, away from direct sunlight, for 2-4 days. If it’s pretty warm in your house, check them after 1 day.
- At the 1-2 day mark, open a bottle to check for carbonation. If the carbonation is to your liking, refrigerate all of the bottles to stop the fermentation and carbonation process. If you want more carbonation, leave them out for another 1-2 days, then check again.
- Once your kombucha has reached the level of carbonation that you like, transfer the bottles to the refrigerator to stop further fermentation.
- Strain the fruit pulp before enjoying (optional, some people like drinking it with the pulp).
- You now know how to make kombucha, and can share the recipe with friends and family. Cheers!
Kombucha Flavor Ideas for Second Fermentation
There are so many flavor options and ways to make kombucha suit your own taste buds. The proportions below are for each 12 oz bottle. If using 16 oz bottles, feel free to increase the fruit to 1/3 cup (with a tiny splash more of vanilla, and 1/2 tsp more of sugar).
Vanilla Berry: 1/4 cup crushed blackberries, raspberries, or blueberries, 1 tsp sugar, 1/4 tsp vanilla extract
Grape: 1/4 cup purple or white grape juice
Wedding Cake: 1.5 tsp brown sugar, 1/4 tsp almond extract
Peach: 1/4 cup peach juice, or freshly crushed peaches
Cream Soda: 1.5 tsp brown sugar, 1/4 tsp vanilla extract
Pineapple: 1/4 cup pineapple juice, or freshly crushed pineapple
Orange Cream: 1/4 cup orange juice (freshly squeezed or bottled), 1/4 tsp vanilla extract
Cherry: 1/4 cup cherry juice, or freshly crushed or halved cherries (pitted)
Apple Spice: 1/4 cup apple juice or minced apple, small slice of ginger, 1/8 tsp ground cinnamon, 1/8 tsp allspice
Orange: 1/4 cup orange juice (freshly squeezed or bottled)
Herbs, flowers, extra add-ins: basil, mint, rosemary, hibiscus, chamomile, lavender, lemon balm, lemongrass, sage, ginger
Additional Information and Tips for a Perfect Kombucha
Some fruits ferment faster than others. When I use strawberries or blackberries, the second fermentation is done in just 1 day vs 2-4 days with other fruits. To be safe, check bottles for carbonation after 1 day.
I usually end up filling (8) 12 oz bottles of kombucha and having 4-6 ounces left over. I refrigerate what’s left over and enjoy it chilled without putting it through the second fermentation.
Kombucha is typically not high in sugar by the time it’s ready to drink. During the fermentation process, the yeast and cultures eat most of the sugar and convert it into beneficial acids, gases, and probiotics.
There are no “exact” fermentation times, because so many variables exist (like the temperature in your home, the type of fruit you use, etc.). The only true way to know your brew is ready is to taste it. Your kombucha is ready when it has the balance of sweetness and tang that you like. A shorter ferment will be sweeter, while a longer one will be more tangy and tart.
This 1 gallon kombucha recipe calls for 3/4 cup of organic cane sugar, which is enough, but you can use up to 1 cup of sugar if you wish.
The reason we use organic cane sugar is because it’s the easiest for the SCOBY to break down. Other types of sugars like turbinado, coconut, brown sugar, maple syrup, etc., are harder for the SCOBY to process and can stress it out over time.
Kombucha ferments best between the temperatures of 75-85°F (24-29°C), although this isn’t a hard rule. Just know the warmer the room temperature, the faster it will ferment; the colder the room temperature, the slower it will ferment.
Black tea is the most commonly used, and it’s traditional, but you can experiment with green tea, oolong, or white tea. Just try to avoid teas with added flavors or oils, as they can harm the SCOBY.
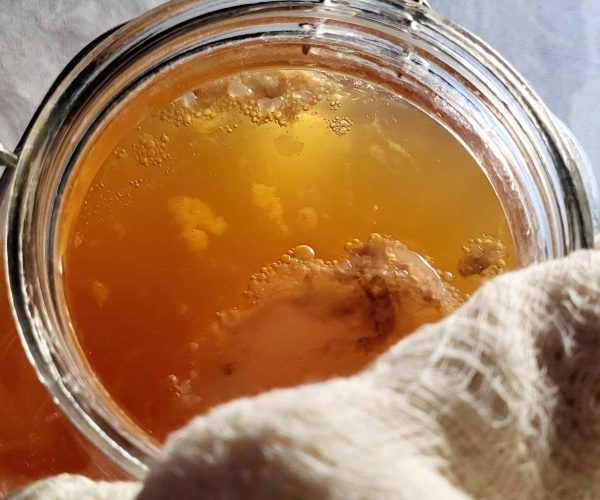
During the first fermentation, the SCOBY will likely move around the brewing vessel. One day you might see it floating on top, and another day it might be hanging out at the bottom. This is normal, the SCOBY is just dancing around having a great time in its environment.
Also during the first fermentation, you’ll likely see another SCOBY forming, or particles (yeast) that look similar to it floating on top of the liquid. This is also normal. What’s great is, with each new batch of kombucha, another SCOBY will likely form, so you can gift them to friends and family!
If your kombucha isn’t getting fizzy after a few days of secondary fermentation, it could either mean 1. your room temperature is on the colder side, 2. it wasn’t fed enough sugar upon bottling to produce carbonation, 3. the tops weren’t closed tight enough. Adjust as needed and leave the bottles out to ferment for a couple more days.
After the second fermentation is done, you might notice a small pellicle, like a mini SCOBY, floating at the top of your bottles. This is normal; simply remove or strain it out before enjoying. I notice this happens when I use certain pureed fruits, like blueberries for instance.
When storing the SCOBY and starter tea, secure a breathable cover over it so it has access to some oxygen, without allowing dust or flies to get in. Store it in a cool and dark place, like a pantry or cabinet.
Annnd, while you wait for your kombucha to finish fermenting, consider giving water kefir a try, as it typically only takes 2-4 days to ferment from start to finish!
Final Thoughts
I hope this post inspires and motivates you to easily make kombucha in the comfort of your own home. It is a fun and rewarding process that allows you to customize the flavors and carbonation of your brew.
With the first fermentation, you create a tangy tea that is rich in probiotics, and the second fermentation adds the delicious fizz and flavors of your choice. By following the steps in this guide, you can enjoy healthy, homemade kombucha that is both tasty and packed with beneficial nutrients.
Now go enjoy your fermentation journey, and experience creating this delicious and trendy drink right from your own kitchen!
Disclaimer:
This post is for informational purposes only and is not intended as medical advice. Always consult with a healthcare professional before making any significant changes to your diet, especially if you have existing health conditions.
Other Fermented Drinks you Might Like

Kombucha, First and Second Fermentation Recipe
Equipment
- 1 gallon glass or lead-free porcelain jar (I use one with a dispenser but that's optional)
- Breathable cover (muslin cloth, cheesecloth, thin tea towel, coffee filter, etc.)
- Rubber band
- Small to medium pot
- Strainer, tea ball, or muslin tea bag (if using loose-leaf tea)
- Long spoon (wooden, silicone, or plastic)
- 16 oz bottles (6-7), or 12 oz bottles (7-8) (carbonation-safe bottles designed to hold pressure build-up)
- Pitcher or glass measuring cup with spout (optional), or simply use a funnel
- Separate glass container (to store the SCOBY with 2 cups of kombucha starter tea for future use)
Ingredients
Kombucha First Fermentation:
- 2 cups spring or filtered water (to make a concentrated tea)
- 10 cups room temperature water (use spring or filtered water)
- 2 - 3 tbsp loose-leaf black or green tea, or 6 - 8 tea bags (I use black tea; use 2 tablespoons or 6 tea bags for a slightly milder tea, and 3 tablespoons or 8 tea bags for a stronger tea)
- 3/4 cup organic cane sugar
- 1 live kombucha SCOBY (not dehydrated)
- 1.5 - 2 cups kombucha starter tea (if you purchase a live SCOBY it usually comes in a starter tea, alternatively you can use store-bought raw unpasteurized unflavored kombucha)
Kombucha Second Fermentation:
- Fresh fruit (pureed, mashed, diced, or whole) or fruit juice (the live cultures need a sugary source of food, and this will also help create carbonation)
- Herbs of choice (optional)
- Organic cane sugar (only if you don’t want to use fruit/fruit juice, or if you’re using fruit with low sugar content like just about any berry, wild blueberries, cranberries, rhubarb, lemon, or lime)
Instructions
Kombucha First Fermentation:
- Brew a concentrated batch of sweet tea by bringing two cups of water to a boil. Turn the heat off, add the tea, and let it steep for 10-15 minutes. Remove the tea ball or muslin tea bag, or strain to remove the leaves. Add the sugar and stir until dissolved.
- Pour the hot sweet tea into the 1 gallon jar, and then add 10 cups of room temperature water to it. This helps cool down the hot tea; you can't add the SCOBY or starter tea to hot liquids, as the live cultures can die. The temperature of the tea should be below 85°F (29°C), but not too cold.
- Add the kombucha SCOBY and 1.5 - 2 cups of starter tea to the jar, then give it a gentle stir.
- Cover the opening of the jar with the breathable cloth and secure it with a rubber band.
- Place jar on top of a counter, or in the pantry, away from direct sunlight. Leave it undisturbed for 7-14 days. Feel free to taste it around the 7 day mark to see if it still tastes sweet. If so, leave it out for another few days to 1 week. When it's done, it should be just slightly sweet, with tangy and vinegary notes. The fermentation time depends on the temperature in the home; the colder it is, the slower it ferments, the warmer it is, the faster it ferments.
- At this point the first fermentation is done. If you don't wish to put it through a second fermentation for flavoring and carbonation, you can transfer the kombucha to bottles and refrigerate them.
- NOTE: Whether you choose to stop after the first fermentation or put it through a second fermentation, you'll want to first remove the SCOBY and 2 cups of the kombucha tea, and place them in a separate glass jar. This is what you will use to make a future batch of kombucha. Secure a breathable cover over it, and store it in a cool and dark location like a pantry or cabinet until you are ready to use it again.
Kombucha Second Fermentation:
- Stir the remaining kombucha (to reincorporate all of the yeast and live cultures throughout).
- If using 12 oz bottles, add 1/4 cup of fruit juice, or pureed or fresh fruit, into each of your bottles (using a funnel will help). If using 16 oz bottles, add 1/3 cup. If you are not using fruit or juice, or are using fruit with low sugar content, add 1 teaspoon of sugar to each 12 oz bottle, or 1.5 teaspoons to each 16 oz bottle.
- Pour the kombucha into a pitcher or a glass measuring cup with a spout (to make pouring into the bottles easier), or simply use a funnel. Top each bottle off with kombucha tea, leaving about 1/2 - 1 inch of headspace at the top of the bottles.
- Place all of the lids on tightly, and then invert them gently a few times to incorporate the fruit/sugar into the tea.
- Leave the bottles out on your counter or pantry, away from direct sunlight, for 2-4 days. If it's pretty warm in your house, check them after 1 day.
- At the 1-2 day mark, open a bottle to check for carbonation. If the carbonation is to your liking, refrigerate all of the bottles to stop the fermentation and carbonation process. If you want more carbonation, leave them out for another 1-2 days, then check again.
- Once your kombucha has reached the level of carbonation that you like, transfer the bottles to the refrigerator to stop further fermentation.
- Strain the fruit pulp before enjoying (optional, some people like drinking it with the pulp).
- You now know how to make kombucha, and can share the recipe with friends and family. Cheers!
Notes


