I absolutely love fermented foods; it’s one of my favorite ways to preserve our homegrown vegetables, or those we get from the market. Fermentation is a natural process that has been used since ancient times to preserve food. It helped our ancestors keep grains, veggies, and milk fresh for longer periods of time.
Some commonly known fermented foods today include yogurt, milk kefir, water kefir, kombucha, sourdough, sauerkraut, vegetables, cheese, kimchi, miso, and soy sauce.
During fermentation, yeast and good bacteria break down sugars and carbs into acids and alcohols. These natural preservatives are what give fermented foods their uniquely tangy flavor.
In this post, you’ll discover why more people today are embracing the magic of fermentation for the probiotic benefits, nutrients, flavor, and cost savings
What Makes Fermented Foods so Special?
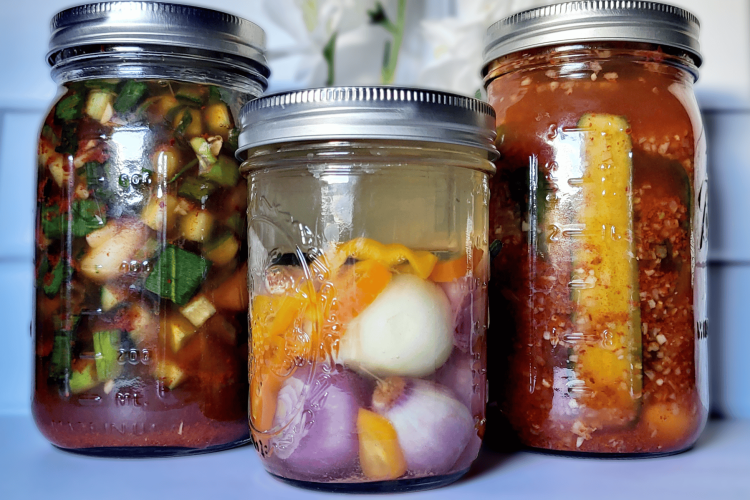
The true magic of fermentation is that it’s the only preservation method that actually makes foods healthier instead of degrading their nutritional value. This is because it creates additional nutrients in the process such as vitamin K2, B vitamins, antioxidants, lactic acid, lactase, and more. Fermented foods can boost digestion and help keep our gut healthy by supporting a balanced microbiome.
Not only that, but fermenting your own vegetables saves money. The cost of fermented foods in grocery stores is much higher than purchasing the items and doing it yourself. Win win!
The Benefits of Fermented Foods
Foods are our best source for nutrients, and when our gut is healthy and balanced, our body is able to absorb those nutrients much more effectively.
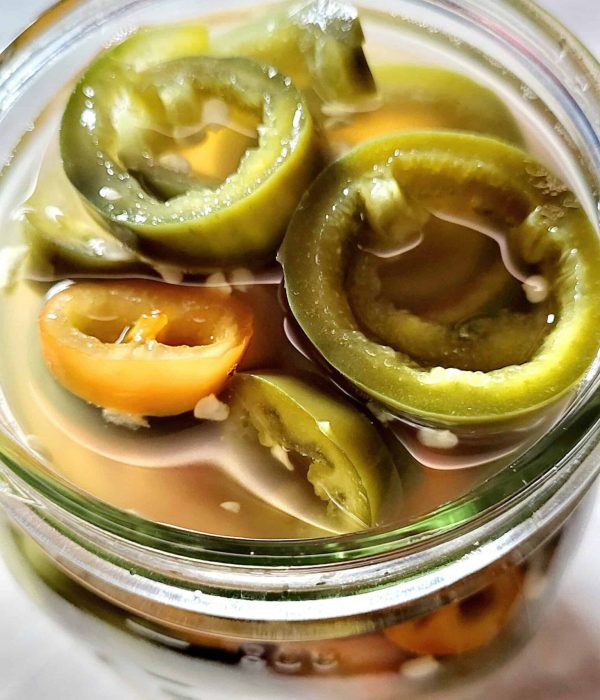
Fermented foods contain many probiotics. Those probiotics help kill off bad bacteria in our gut, and they also prevent them from multiplying.
Did you know that over 70% of our immune system is housed in our gut?! Because of this, what happens in our gut has a direct influence on our overall well-being.
What’s more, they also help our bodies absorb and use important minerals more efficiently, which also helps keep our bones strong and healthy.
What is Lacto-Fermentation?
The word “lacto” is short for Lactobacillus, which is a type of good bacteria that lives on plants and crops. Lacto-fermentation happens when naturally occurring lactic acid bacteria break down sugars in vegetables and convert them into lactic acid. This process preserves the food and gives them that nice, tangy flavor.
To lacto-ferment vegetables, you will submerge them in a saltwater brine for a period of 7-30 days, depending on what’s being fermented and the temperature in the home. The saltwater brine creates an environment where harmful bacteria can’t grow, but allows Lactobacillus to multiply and thrive.
Now, there are other species of good bacteria that live in many fermented vegetables during the first two weeks of the process, like Leuconostoc and Pediococcus. However, after the first two weeks, the Lactobacillus typically end up taking over the group (hence the name “lacto-fermentation”).
Note, however, that preserving foods by lacto-fermenting differs from preserving by pickling. Pickled vegetables almost always use vinegar, while lacto-fermented vegetables use salt. Additionally, fermented vegetables are rich in probiotics, while pickled vegetables do not contain any. Furthermore, pickled vegetables have more of a sour flavor, while fermented vegetables are more on the tangy side.
Salt Concentration in Fermented Vegetables
Before we cover how to ferment vegetables, we’ll need to go over some basics on salt concentration and simple math that can be done on a calculator :). To properly ferment vegetables, you’ll need filtered water and non iodized salt. The vegetables need to be submerged in a salty brine for 7-30 days. Salt is what keeps the bad bacteria away while allowing the good bacteria to multiply. It also helps the veggies maintain a crisp texture.
The amount needed depends on what you’re fermenting and the desired outcome. The most straightforward way to calculate the salt concentration is to weigh the total amount of vegetables + water in grams, and then multiply that number by a certain percentage. Higher salt concentrations are needed for vegetables with higher water content or more delicate textures (like peppers, cucumbers, and zucchini). These vegetables will ideally need a salt concentration of 3-4%. My recommendation, which seems to be the sweet spot for most of these, would be a 3.5% salt concentration. Now, lower water content vegetables (like brussels sprouts and onions) typically only need a 2-2.5% salt concentration.
An example of the calculation for higher water content vegetables would be: total weight of vegetables and water is 600 grams, so I’ll multiply that by 3.5%, which on a calculator looks like 600 x 0.035 = 21 grams of salt. Now, if the total weight is 700 grams, it would look like: 700 x 0.035 = 24.5, which in this case you can round up to 25 grams of salt.
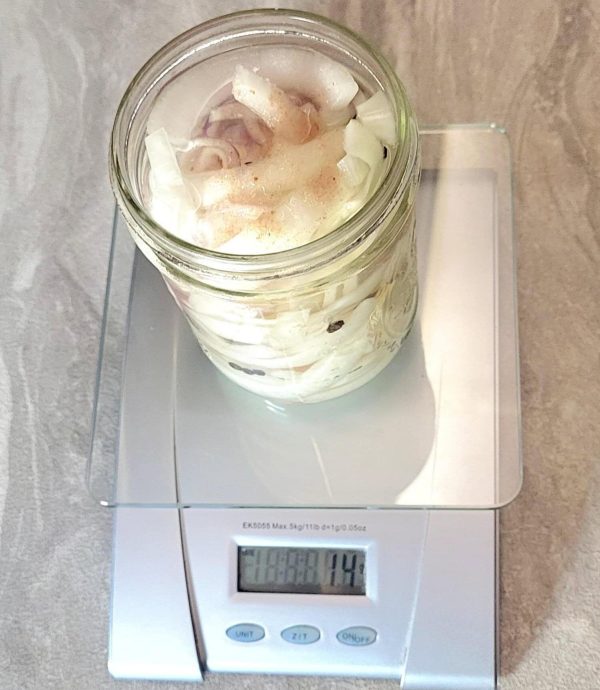
An example for vegetables with lower water content would be to multiply the total weight of the vegetables and water by 2%, which looks like 700 x 0.02 = 14 grams of salt.
How to Make Lacto-Fermented Vegetables
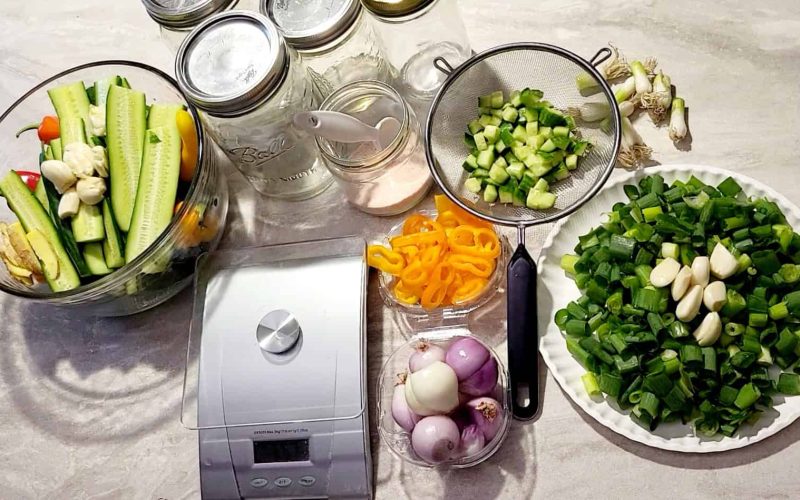
I have some recipes on the blog that go into detail like my lacto-fermented jalapeño peppers and lacto-fermented shallots with peppers. Some ideas on which vegetables to start fermenting would be sweet or hot peppers, shallots, brussels sprouts, broccoli, cauliflower, cucumbers (pickling or English), and you can include herbs like basil, dill, and even garlic and peppercorns.
You can do single ferments or combine them together like peppers with onions and garlic, or sweet peppers with dill. Doing this will add an extra boost of flavor to your ferments. Best part, the equipment and ingredients you’ll need are minimal.
Ingredients and Equipment Needed:
- Organic vegetables of choice
- Filtered water
- Sea salt, Kosher, pickling, or Redmond Real Salt.
- Kitchen scale
- Glass mason jars with lids (can use any size depending on how much you’re fermenting)
- Fermentation weights (you can purchase them online or use what you already have; ideas below under “Tips”)
Instructions:
- Wash your glass jars, lids, and fermentation weights.
- Wash and dry your vegetables, and then either cut them into spears, sticks, slices, halved, whole, or shredded.
- Place your jar without the lid on the kitchen scale and select “tare” to zero out the weight (you don’t want to include the weight of the jar, only the vegetables, water and salt).
- Pack the jar with your vegetables of choice. Leave about 1-1.5 inches of space at the top of the jar, since the vegetables release their own liquids during fermentation.
- Pour filtered water over the vegetables until they are submerged, still leaving about 1 inch of space at the top of the jar. Take note of the total weight of veggies + water in grams. To simplify your calculation, try rounding the total weight to the nearest hundred.
- For higher water content vegetables, multiply the total weight in grams by 0.035 (3.5%). For lower water content vegetables, multiply the total weight by 0.02 (2%). This is the amount of salt in grams that we need to add to the jar (see my calculation example above under the section “Salt Concentration”).
- Select “tare” on the scale to zero out the weight again, and then add your salt.
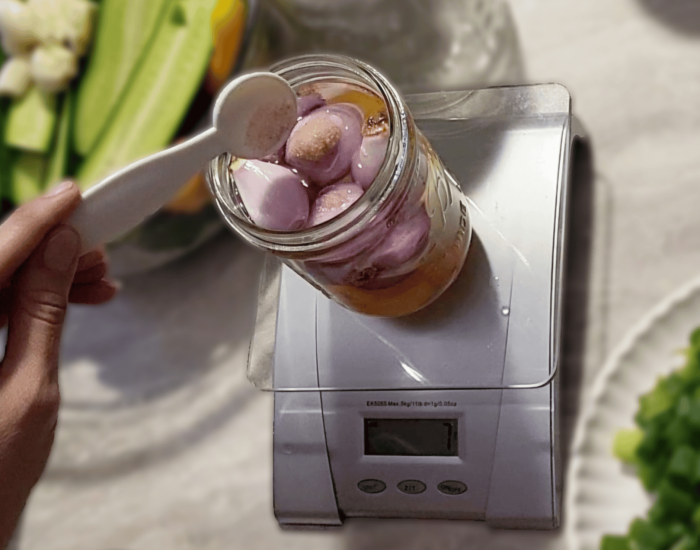
- Tighten the lid and shake for about 1 minute to dissolve the salt.
- Remove the lid and place the fermentation weight on top of the vegetables. The fermentation weight helps keep them submerged in the brine solution the whole time, preventing any chance of mold growth. Now you can refasten the lid.
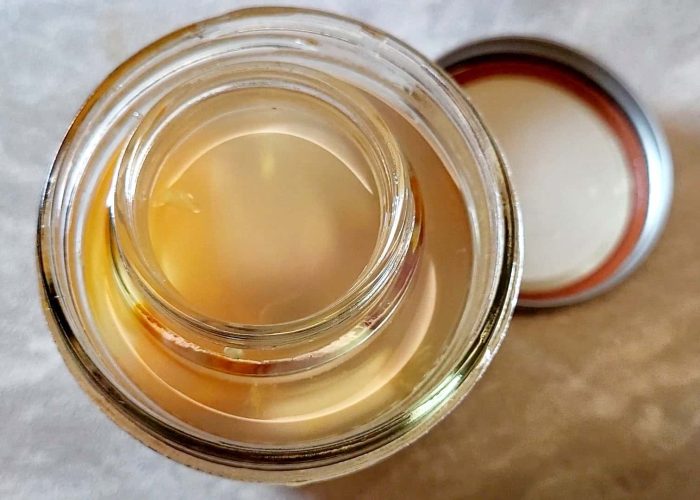
- Place jar on top of your kitchen counter, cabinet, or pantry, away from direct sunlight. The ideal temperature it should be sitting in is between 60°-80°F (15°-27°C), although this isn’t a hard rule. Just keep in mind the colder the room temperature, the slower it ferments; the warmer the room temperature, the faster it ferments.
- After 2-3 days you should start to see bubbles forming. Once that happens, you’ll want to “burp” the jar once a day by unscrewing the lid to release the natural gasses, and then refastening the lid. You will only need to burp the jar during the first week or so, while the bubbling is active. After the first week, the bubbling/gasses slow down significantly. Just keep an eye on it because colder room temperatures slow down fermentation, while warmer temperatures speed things up.
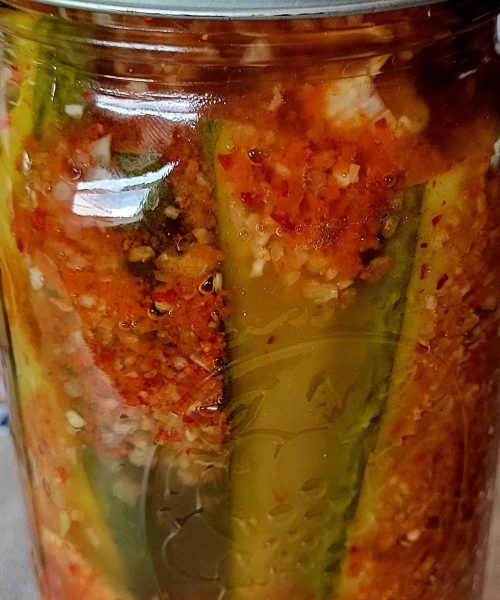
- During the first week the brine will also start to turn cloudy and the veggies may start to look dull and not as vibrant. This is all a normal sign that fermentation is going well.
- Leave the jar out to ferment for 7-30 days. Feel free to check the flavor after 7 days to see if it’s to your liking. The longer you let it ferment, the more beneficial bacteria it’ll contain.
- Once your vegetables have reached the desired level of fermentation, transfer the jar to the refrigerator to slow down the fermentation process and to store it long term.
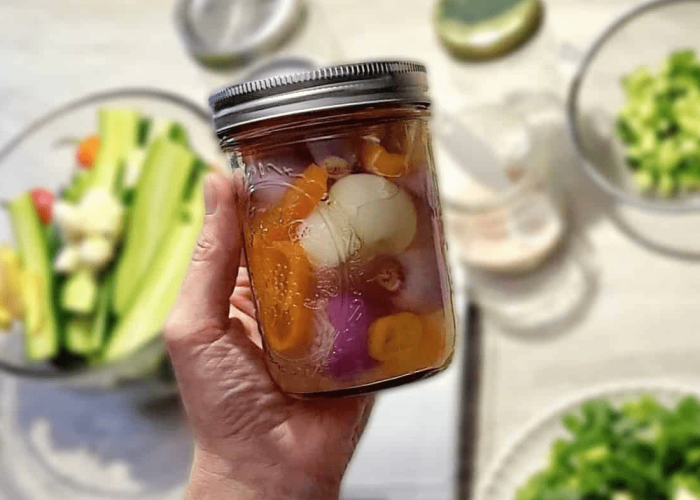
Tips and Safety
- Use fresh, organic ingredients for the best results. Make sure they are free of bruises or blemishes to reduce the risk of introducing harmful bacteria into your ferments.
- Use glass jars and glass fermentation weights, as they are non-reacting.
- Make sure all jars, weights, utensils, and surfaces are thoroughly cleaned before starting your ferments. Don’t forget to also wash your hands 🙂
- Avoid iodized or table salt. Use non-iodized salt, like kosher, sea, pickling, or Redmond Real Salt.
- Use a kitchen scale to weigh your ingredients, so you know the necessary salt concentrations. This is crucial for creating an environment that promotes good bacteria and inhibits bad bacteria.
- Fermentation weights help keep the vegetables fully submerged under the brine, and this is also crucial because any vegetables exposed to air can develop mold, spoil the ferment, and potentially be harmful to your health.
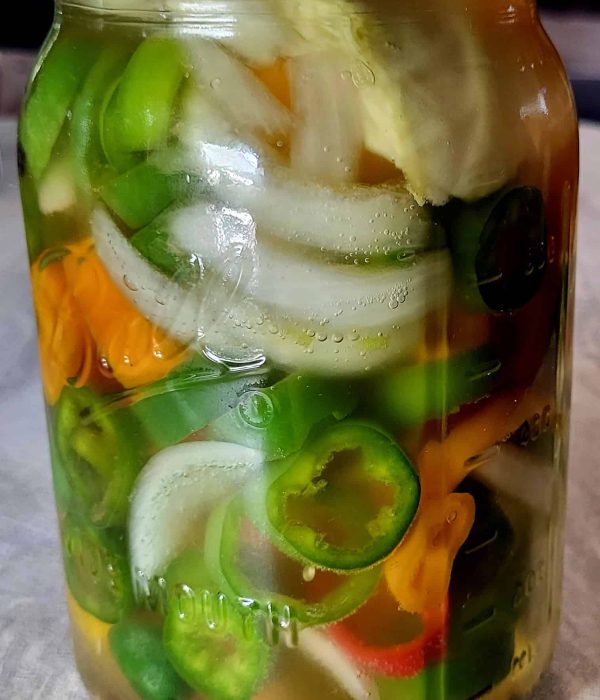
- You can purchase fermentation weights online, which are easy and convenient. However, you can also use items you might already have at home. Some ideas are glass tealight candle holders (without the candles inside), smaller glass containers used for dipping sauces, a round wedge of cabbage, or even an apple cut in half. Just make sure they are thoroughly washed and clean before using them in your ferments. In my photo examples below, I’m using a smaller glass container in the first photo, and a round wedge of cabbage in the second photo as fermentation weights.
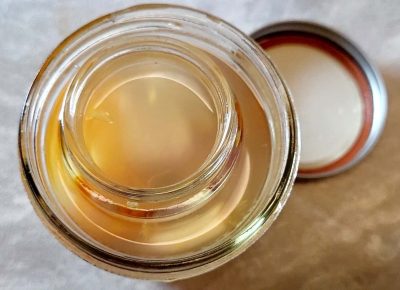
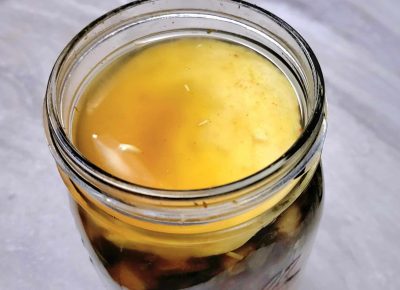
- If you aren’t using special fermentation lids on your jars, you’ll want to “burp” the jars once a day by unscrewing the lid to release the natural gasses; this avoids excessive pressure buildup that can possibly break your jars. You will only need to burp the jars during the first week or so, while the bubbling is active. After the first week, the bubbling/gasses slow down significantly. Just keep an eye on them because colder room temperatures slow down fermentation, while warmer temperatures speed things up.
- Properly fermented vegetables will automatically reach a pH level of 4.0 to 3.5. In this range the vegetables are tart, safe to eat, and have a long shelf life. However, if you prefer to be precise about monitoring the pH levels, you can do so by using pH strips or a digital pH meter.
- After a few days the brine may start to look cloudy. This is normal and usually indicates that the fermentation process is going well. The cloudiness is typically caused by lactic acid and beneficial bacteria during fermentation. It can also be due to the vegetables releasing natural starches and proteins. As long as your vegetables smell sour (in a pleasant way), and there are no signs of spoilage, the cloudiness isn’t something to worry about.
- If you see mold (fuzzy, black, white, or pink growth) or smell anything foul or rotten, discard the batch. Properly fermented vegetables should have a tangy, sour smell. Also, if the vegetables become excessively slimy, it may indicate spoilage, and the batch should be discarded.
- Label each jar with the start date of fermentation to help you track the progress and know when your vegetables are ready.
- Jot down the type of vegetables, salt concentration, and any added spices or herbs to replicate successful batches in the future, or to tweak the recipes as needed.
- Ferments can last over a year if properly stored, but for best flavor, texture, and probiotic benefits, try to consume within 3-6 months.

Other Fermented Recipes you Might Like
Final Thoughts
Fermenting vegetables is a rewarding and nutritious way to preserve your harvest or market-fresh vegetables, enhance flavors, and boost your well-being. By following these simple steps and embracing the natural process of fermentation, you can transform everyday produce into delicious, probiotic-rich foods that nourish your body.
The journey of crafting your own fermented vegetables is not only a cost-effective method of food preservation, but also a creative journey that connects you with a time-honored tradition. Now go grab some fresh veggies, a little salt, and let the magic of fermentation begin!
Disclaimer:
This post is for informational purposes only and is not intended as medical advice. Always consult with a healthcare professional before making any significant changes to your diet, especially if you have existing health conditions.


