This post contains affiliate links. Please read our disclosure policy for more information.
Do you love the smell of freshly baked bread? What about sourdough bread? I know I do! If you’re a home baker looking to elevate your bread game, creating a sourdough starter is a rewarding first step. This guide covers how to make a sourdough starter; from the basics, to troubleshooting and maintenance tips. Join me on this delicious journey to ensure your sourdough adventure is a successful one.
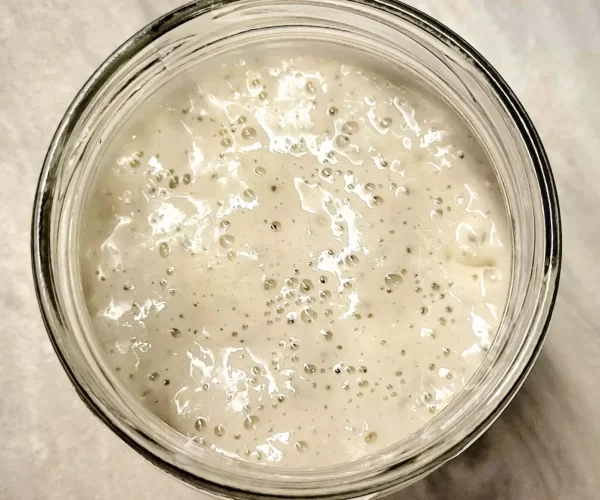
What is a Sourdough Starter?
A sourdough starter is a mixture of flour and water that has captured wild yeast and bacteria from the environment in your home (or wherever you’re making it). This mixture becomes the leavening agent for sourdough bread, replacing commercial yeast. The wild yeast helps the dough rise, while the lactic acid bacteria gives the sourdough its delicious tangy flavor. To make a sourdough starter from scratch, you will regularly feed it with fresh flour and water to keep the yeast and bacteria active and healthy.
What Makes Sourdough Starter so Special?
Once you make a sourdough starter from scratch, you can continue using it for years on end, as long as you maintain it. I’ve been using mine for 3 years now, but I know some people who’ve had theirs for over 10 years, and it has even traveled with them to other countries, capturing wild yeast and bacteria from those places as well! This is what makes sourdough starter so special, in my opinion; each one is unique, as no environment is 100% the same. You can also use it for other baked goods, not just sourdough bread. I’ve made sourdough pancakes, crackers, desserts, naan, tortillas, and much more. I’ll be adding more recipes to the blog, so be sure to check back in every once in a while 🙂
Benefits of Making your own Sourdough Starter
- Unique Flavor Profile: Each starter is unique and reflects the local environment of your area.
Natural Leavening: Unlike commercial yeast, a sourdough starter uses wild yeast and bacteria that naturally occur in the environment. This gives your sourdough bread a unique flavor and texture that can’t be replicated with store-bought yeast or bread.
Complex Flavor: The fermentation process of your sourdough starter produces lactic acid, which creates that distinct tangy flavor of your sourdough breads and other sourdough baked goodies.
Better Digestion: Sourdough is often easier to digest because the fermentation process breaks down gluten and other proteins. It also has a lower glycemic index, which means it has less impact on blood sugar levels.
Longevity: A well-maintained sourdough starter can last for years, even decades. With proper care and regular feeding, it can be passed down through generations.
Versatility: A sourdough starter can be used in a variety of recipes beyond bread, such as pancakes, waffles, desserts, pizza dough, and more, adding a unique flavor to all of your baked goods.
How to Make a Sourdough Starter from Scratch
I’ll walk you through the easy step-by-step process here, but if you’d rather follow along using a flow chart, I created a handy one down below (I found flow charts to work better for me when I first learned how to make a sourdough starter).
Just a heads up: this post contains affiliate links, which means I may earn a small commission (at no extra cost to you) if you make a purchase through them. These are all items I’ve personally used and love. Thank you for supporting my blog! 😊
Ingredients and Equipment:
- Unbleached all purpose flour (or unbleached bread flour)
- Filtered water
- 2 glass jars with lids
- Kitchen scale
Day 1:
In a glass jar, combine 50 grams of all purpose flour and 50 grams of water. Stir to combine, and place the lid on top of the jar, but don’t tighten it. Leave it at room temperature on a countertop or in your pantry.
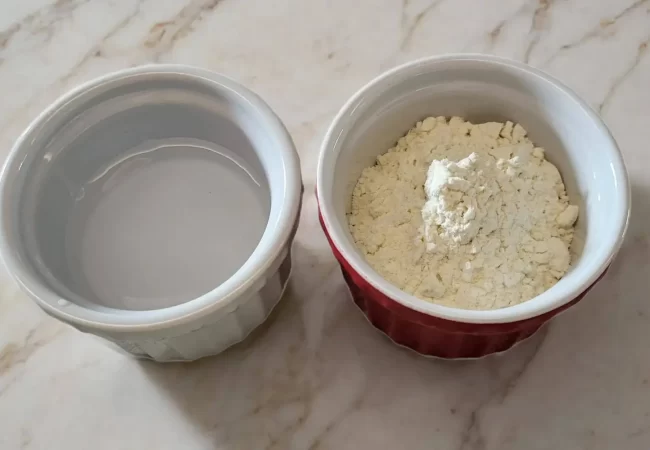
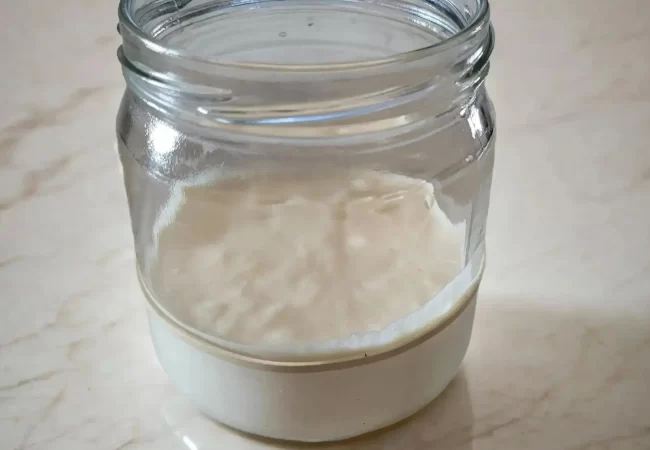
Day 2:
24 hours later, using a clean glass jar, add 50 grams of yesterday’s flour/water mixture, plus 50 grams of flour, and 50 grams of water; stir to combine. Place the lid on top but don’t tighten it, and leave it out on your counter or pantry. “Discard” the rest of yesterday’s mix (place it in the fridge, because you can make so many things with sourdough discard, and you’ll keep adding more discard to this batch over the next few days).
Day 3:
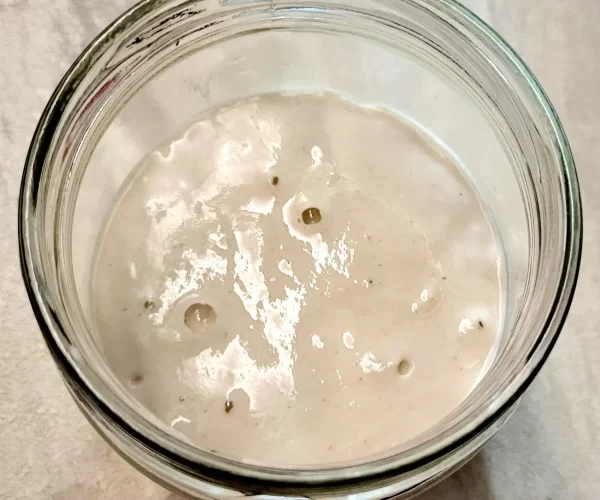
24 hours later, combine 50 grams of yesterday’s flour/water mixture, plus 50 grams of flour, and 50 grams of water; mix to incorporate. Place the lid on top but don’t tighten it, and leave it out on your counter or pantry. “Discard” the rest of yesterday’s mix and refrigerate. You may start to notice a rise in your starter, and maybe even some bubbles (like the photos below), but it’s not ready just yet. If you don’t notice any activity at this point, that’s okay; keep feeding it daily.
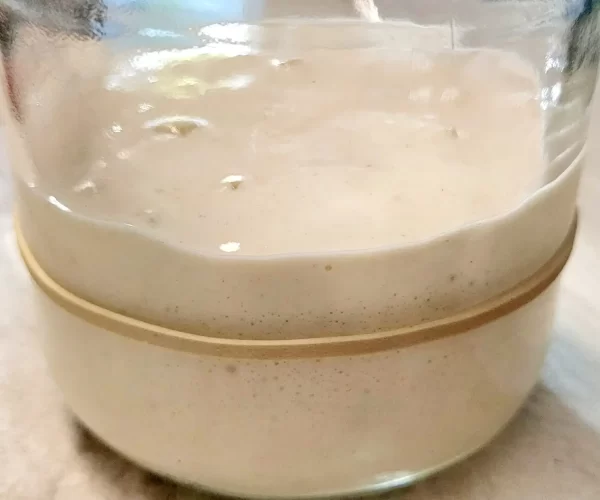
Days 4 - up to 10:
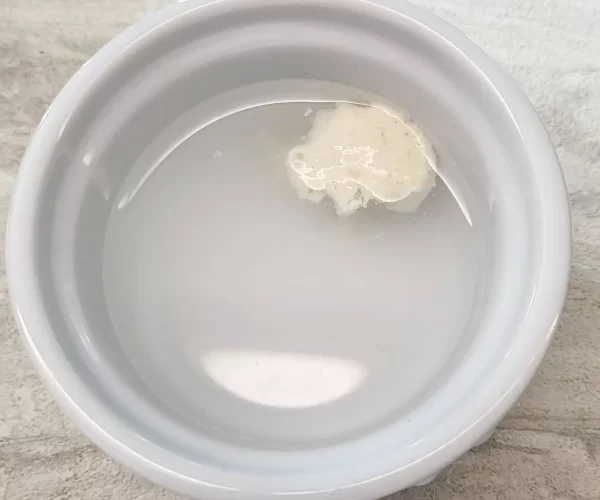
Repeat the previous day’s steps until your starter is bubbly and has doubled in size within 4-12 hours of feeding. This can happen as early as day 5, or up to day 10 depending on the temperature in your home. The warmer it is, the quicker it ferments; the colder it is, the slower it ferments. Tip: use a rubber band around the jar to mark the starting level of your mixture so you know when it has doubled. When it’s ready, it will be very bubbly and smell mildly sour. To know for sure, you can also do a float test by placing a small spoonful of starter into a cup of water. If it floats, it’s ready to use. If it sinks, it needs more time to develop.

Tips for a Successful Sourdough Starter
- Use Filtered or Bottled Water: Avoid tap water, as it may contain chlorine or chemicals that can prevent yeast growth. Filtered water from a well is fine to use.
- Use Unbleached Flour: Unbleached flour is less processed and has more of the natural microbes that contribute to a healthy starter.
- Maintain a Consistent Feeding Schedule: Regular feedings encourage healthy yeast and bacteria growth.
- Avoid Metal Containers: Don’t use metal containers or utensils, as they can react with the acids in the starter.
Common Issues and Troubleshooting
My Starter Isn’t Rising or Bubbling:
It can sometimes take up to 14 days for your sourdough starter to be ready. Make sure you are feeding it every 24 hours, using the correct starter/flour/water ratios, and that the temperature in your home is suitable. Sourdough ferments slower when temperatures are below 70°F (21°C).
My Starter Smells Off:
Normal odors are sour, tangy or slightly sweet. If it smells overly acidic, it can mean over-fermentation due to high temperatures in the home or the area it’s being kept in (over 78°F / 25°C ). This can be corrected by switching to 12 hour feedings for a day or two, and making sure it’s being kept in temperatures between 70-77°F (21-25°C).
There’s a Layer of Liquid on Top:
This liquid is completely normal. It’s called “hooch,” and it means your starter is hungry. Pour the liquid out and feed the starter every 12 hours instead of 24, for a day or two.
Can My Starter Be Saved if I’ve Missed a Feeding?:
Yes, just feed it when possible. Gradually, it will return to normal.
Handy Sourdough Starter Flow Chart:

Maintaining Your Sourdough Starter
Now that you’ve learned how to make a sourdough starter from scratch, it’s time to talk about maintenance. Since this is a living thing, it will require regular feedings, and maybe even a name. My daughter named ours Emily lol.
Routine Feedings:
I highly recommend storing your sourdough starter (and sourdough discard) in the refrigerator because it requires less maintenance. You’ll only have to feed it once every 1-2 weeks, however I’ve gone 2 months without feeding mine, and it was still fine after 1-2 feedings.
When you feed it, you need to give it equal parts of flour + water to starter. For example, if you have 100 grams of starter in your fridge, you’ll need to feed it 100 grams of water and 100 grams of flour. Once mixed, leave it at room temperature for 4-12 hours, or until it’s active and bubbly, and then use some in a recipe like my small batch air fryer sourdough bread.
You can now place it back in the fridge (but try to use some of this “discard” in sourdough discard recipes because if not, you’ll end up with a huge batch of discard and no place to store it). You can use some of the discard in my sourdough discard pumpkin chocolate chip cookies recipe (they are lower in fat than traditional cookies). As this blog continues to grow I’ll be adding more discard recipes here, so be sure to check back in 🙂
Storage:
Store it in the refrigerator if not baking daily. When you need to bake with it, take some out and measure it in a separate jar, then feed it (be sure to place the main jar back in the fridge). Leave the newly fed starter at room temperature for 4-12 hours, or until active and bubbly before using it in your recipe. I say “take some out” because you could have a whole quart-sized mason jar’s worth of sourdough starter/discard in your fridge, but wouldn’t need that much for your recipe.
Reviving a Dormant Starter:
If you see a layer of grey liquid on top (called “hooch”), this means your sourdough starter is hungry. Simply pour the liquid out (don’t worry about not getting it all out; it’s safe to incorporate back into your starter), then feed the starter and let it sit at room temperature for 4-12 hours until it reactivates. If you don’t see any results after 12 hours, feed it again, and then every 12 hours until it reactivates.
Sourdough Starter FAQs
This post contains affiliate links. Please read our disclosure policy.
Yes, you can use:
- Whole wheat flour for a nuttier flavor and slightly denser texture.
- Rye flour for an earthy and nutty flavor with a denser texture.
- Spelt flour for a mildly sweet, nutty flavor with a soft crumb.
- Einkorn flour for a mildly sweet, nutty, and buttery flavor with a soft and tender crumb.
Some flours hydrate differently, so you may need to adjust the water in your starter. The general rule of thumb is that you typically want your starter to resemble a thick pancake batter (although there are still other variations out there). If it's too thick, just add some more water. However, it's better to have a thick starter than a thin one, as thin won't give you a proper ferment and rise.
It's not too often you see a bad starter unless you haven't fed it for months (if stored in the fridge), or you've left it out too long without feeding (days-weeks). However, there are some indicators to know if your starter has gone bad:
Foul Smell: If your starter smells putrid, like rotten cheese, you may need to toss it and start over.
Visible Mold: Any appearance of mold (green, blue, black, or white fuzzy spots) on the surface or sides of the container is a clear sign that the starter has gone bad and should be thrown out.
Color Streaks: Pink or orange streaks in the starter indicate bacterial contamination. The starter should be thrown out.
Note, if you see a layer of grey liquid on top of the starter, it is called hooch and is normal. It just means your starter is hungry. Simply pour the hooch out and feed your starter. Also, an overly acidic smell is likely due to an over fermented starter. You can usually revive it by feeding it a couple of times.
Yes, sourdough is generally considered healthier for several reasons:
Reduced Phytic Acid: The fermentation process breaks down phytic acid, which is a compound found in grains that prevents your body from absorbing certain minerals like iron, zinc, and calcium. With lower phytic acid levels, these minerals are easier for your body to absorb.
Gluten Breakdown: Fermentation helps break down gluten, making it easier for some people to digest. Although it’s still not suitable for those with celiac disease, it can be better tolerated by those with mild gluten sensitivities.
Slower Blood Sugar Rise:
Sourdough has a lower glycemic index than regular bread, which means it causes a slower rise in blood sugar levels.
Increased Nutrient Availability:
The fermentation process increases the levels of certain vitamins and minerals like B vitamins, folate, and antioxidants.
Like people, sourdough starters that are properly maintained can last for many decades, even a century! Living things are awesome.
Keeping your starter in the fridge is recommended if you aren't baking with it daily. Remove it from the fridge to feed it every 1-2 weeks (I've even gone 1-2 months before feeding mine again and it was still perfect; see how to revive a starter in the post above). After feeding, leave it out on your counter for 4-12 hours - or until active and bubbly - before storing it back in the fridge.
Final Thoughts
I hope the information in this post encourages you to go and make a sourdough starter from scratch. It’s a simple but long process initially, however it’s so worth it and rewarding in the end. By following these easy steps and tips, you’ll soon have a bubbling, active starter ready to bake delicious sourdough breads and treats. And if properly maintained, it will last you decades!
Other Fermented Recipes you Might Like

How to Make a Sourdough Starter - Recipe
Equipment
- 2 Glass jars with lids
- 1 Kitchen scale
Ingredients
- 350 grams unbleached all purpose or bread flour (you'll use 50g daily, but you may need more or less total)
- 350 grams filtered water (you'll use 50g daily, but you may need more or less total)
Instructions
Day 1
- In a glass jar, combine 50 grams of all purpose flour and 50 grams of water. Stir to combine, and place the lid on top of the jar, but don’t tighten it. Leave it at room temperature on a countertop or in your pantry.
Day 2
- 24 hours later, using a clean glass jar, add 50 grams of yesterday’s flour/water mixture, plus 50 grams of flour, and 50 grams of water; stir to combine. Place the lid on top but don’t tighten it, and leave it out on your counter or pantry. “Discard” the rest of yesterday’s mix (place it in the fridge, because you can make many things with sourdough discard, and you’ll keep adding more discard to this batch over the next few days).
Day 3
- 24 hours later, combine 50 grams of yesterday’s flour/water mixture, plus 50 grams of flour, and 50 grams of water; mix to incorporate. Place the lid on top but don’t tighten it, and leave it out on your counter or pantry. “Discard” the rest of yesterday’s mix and refrigerate. You may start to notice a rise in your starter, and maybe even some bubbles, but it’s not ready just yet. If you don’t notice any activity at this point, that’s okay; keep feeding it daily.
Day 4 up to Day 10
- Repeat the previous day’s steps until your starter is bubbly and has doubled in size within 4-12 hours of feeding. This can happen as early as day 5, or up to day 10 depending on the temperature in your home. The warmer it is, the quicker it ferments; the colder it is, the slower it ferments. Tip: use a rubber band around the jar to mark the starting level of your mixture so you know when it has doubled. When it’s ready, it will be very bubbly and smell mildly sour. To know for sure, you can also do a float test by placing a small spoonful of starter into a cup of water. If it floats, it’s ready to use. If it sinks, it needs more time to develop.
Notes
- See post for more detailed explanations, troubleshooting, FAQs, flour substitutions, a handy flow chart, and maintenance tips.
- Use filtered or spring water. Avoid tap water, as it may contain chlorine or chemicals that can prevent yeast growth. Filtered water from a well is also fine to use.
- Use unbleached flour as it is less processed and has more of the natural microbes that contribute to a healthy starter.
- Avoid using metal containers or utensils, as they can react with the acids in the starter.


